Hello Wayland -- Wayland教程
翻译自https://hdante.wordpress.com/2014/07/08/the-hello-wayland-tutorial/
TLDR
我写了一个wayland下的hello world,源码在 https://github.com/hdante/hello_wayland。
介绍
从最终用户的角度,很容易理解wayland是什么:它是一个新的窗口系统,它将显示服务器和窗口管理器合并了[1]。从技术角度来看,wayland是为了摆脱传统,使用现代设计来实现一个高效的窗口系统,解决X窗口系统中长期存在的效率问题和一些极端情况[2]。这个教程展示如何实现一个作为wayland客户端的hello world程序、解释基础的wayland概念、创建一个GUI程序的必要流程。hello world程序不需要任何GUI工具包,它直接使用底层的wayland协议,以便解释wayland的基础概念。本教程是我自己研究wayland协议的结果。教程分为两部分。这是第一篇教程,解释所有的概念和程序的高级部分。
再问一次,什么是wayland?
wayland窗口系统的的完整设计分为好几层。如果你下载了wayland library的代码[3],或者你看了下wayland的API[4],你会注意到两层:
- 最基础的一层是进程间通讯功能的实现,以及一些实用工具。比如主循环调度器和一些数据类型。大部分这些代码都出现在wayland library中(所有在src文件夹[5]中的内容),并且和窗口系统无关。
- 第二层是窗口系统协议。它的描述在
protocol/wayland.xml[6]文件中,这个文件应该算是一种接口定义语言。IDL文件可以用wayland-scanner工具处理,并在wayland-client-protocol.h和wayland-server-protocol.h中生成代理方法。协议定义了客户端程序和显示服务器的基础功能。比如访问输入设备、注册共享缓存以便显示在屏幕上。wayland library并不实现这些协议。这些协议的实现被分割到一个第三方层。服务端的参考实现是weston的一部分[7],它在客户端和服务端都定义了一些附加层。以实现wayland协议。在hello world程序中,我们并不需要了解任何关于weston的东西。我们仅仅需要IDL文件。
从上面关于wayland library的描述中,我们发现wayland的三个定义。它是一个(额听用途的)IPC库,不像D-Bus库,它仅仅用于显示服务器,并且它没有定义wayland到底是什么、wayland协议的定义以及如何找到协议定义。我相信即使人们在阅读官方文档后,大部分人也不明白wayland到底是什么。我想,这三个定义澄清了“什么是wayland”这个问题,每一个定义都能够用在不同的上下文中。
Hello, World!
介绍的部分已经够长了,我们来看看hello world的代码:
1 | |
wayland协议太啰嗦,所以我将代码分成两部分,包含了协议细节的部分以及其他部分。主模块,如上所述,包含了高级层面的hello world实现。main函数代表与显示服务器进行通信以显示hello world窗口并接受指针设备输入所需的完整步骤,在单击时关闭应用程序。代码的相关部分的描述如下:
#include "helpers.h"
helper模块包含了hello_*函数和wayland中的一大堆全局对象。全局根对象是一个名字为display的对象,代表了一个与显示服务器的连接,并且被用于发送请求、接受事件。在运行主循环的时候,也会用到display对象。在本教程的下一部分中将详细介绍helper模块。
1 | |
在本教程中,我们将一个图像显示为主窗口,另一个用于显示光标。 它们的位置是硬编码的。 然而,在一般应用中,值将被动态计算。
1 | |
这是按钮回调。当一个按钮被点击的时候,我们设置done为true,可以让我们离开main中的主循环。
hello_setup_wayland();
程序开始就会调用setup函数,连接到显示服务器,从服务器请求一系列的全局对象,填充到代理变量中去。
image = open("images.bin", O_RDWR);
然后,我们打开图片文件。这个图片文件包含了硬编码的图片,已经是显示用的数据格式了:它是显示用的像素值。
pool = hello_create_memory_pool(image);
wayland的主要设计哲学就是处理图像的时候更加高效。wayland使用在客户端和服务器端共享内存的方式达到这个目标,所以数据不会在服务器和客户端之间复制。客户端和服务器端共享的基本元素就是共享内存池,就是一段内存被mmap到客户端和服务器端。在内存池中,一系列图片能够被当作缓存对象添加到其中,这些图片也都是共享的。 在hello world程序中,我们mmap了我们的硬编码图像文件。在一般程序中,会创建一个空的内存池,比如用shm_open()创建一个共享内存对象,然后用展示widget的图片,动态构造图片缓存。在写hello world程序的时候,我必须决定我应不应该创建空的内存池、分配内存,以及哪种方式更容易理解。或者我使用一个不太直观的例子来创建一个预建内存池。我决定用这个直观的例子,有一个重要的原因:如果你阅读整个hello world的源代码,你会发现在任何地方都没有内存复制操作。图像文件打开一次,并显示一次。不需要额外的副本。这样做是为了明确指出,如果认真实施,wayalnd应用程序可以实现效率最大化。
surface = hello_create_surface();
代表了可见元素的对象变成了平面。平面是一个长方形区域,有自己的位置和大小。平面被缓冲对象填充。在平面的生命周期中,将附加几个缓冲区作为平面内容,并且会求服务器重绘平面。在hello world例子中,平面对象的类型是wl_shell_surface,被用来创建顶级窗口。
buffer = hello_create_buffer(pool, WIDTH, HEIGHT);
缓冲对象里面有平面要显示的内容。缓冲在内存池中被创建(它们是内存池切片),以便它们由客户端和服务器共享。在我们的例子中,我们不会创建一个空的缓冲对象,我们用一个已经填充好数据的的缓冲对象。
hello_bind_buffer(buffer, surface);
为了使缓冲区显示到屏幕,我们需要将缓冲区数据绑定到平面,也就是将平面内容设置为缓冲区数据。绑定操作也会讲平面提交到服务器。在wayland中,有一个平面所有权的概念:要不就是客户端拥有平面:客户端可以在平面上绘制(服务端复制了一份旧的平面);要不就是服务端拥有平面:客户端无法修改平面,因为服务器正在屏幕上绘制它。为了将所有权转移到服务器,我们给服务器提交请求;为了将所有权返回给客户端,服务器发送一个release事件。在一般应用程序中,表面将来回转移所有权,但在hello应用程序中,只需执行一次即可,作为绑定操作的一部分。
1 | |
设置了主窗口了之后,我们来配置鼠标指针。这是必须的步骤:客户端必须设置鼠标指针。在这儿,我们将鼠标指针设置为内存池中的内容。helper模块为鼠标指针创建一个平面和缓冲对象。我必须决定是将指针配置放在helper里面,还是将它放到外面的高层逻辑里面来。我决定用后者,来展示wayland中的角色划分:客户端能够控制绘制什么、如何绘制。
hello_set_button_callback(surface, on_button);
设置的最后一步是设置回调:将界面点击和on_callback回调关联起来。
1 | |
这段代码调用主循环,将全局变量display作为参数。当done为true的时候,主循环退出——或者因为出错了,或者因为按钮被点击了。
1 | |
程序结束了,清理所有我们申请的资源。
总结
这是wayland的hello world教程的第一部分。主要讨论什么是wayland,如何描述操作,在一个高级的例子中。在下一部分,我将会详细介绍helper函数。
截图
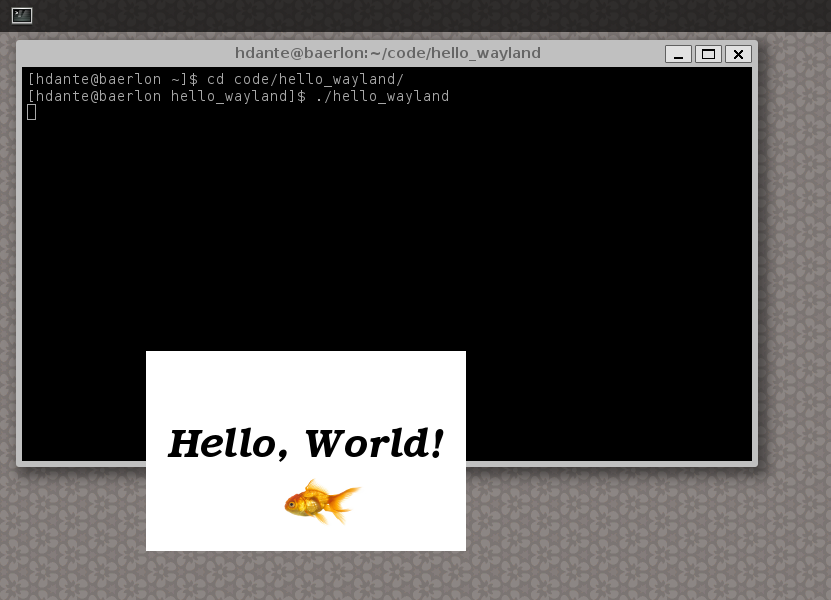
原作者截图:
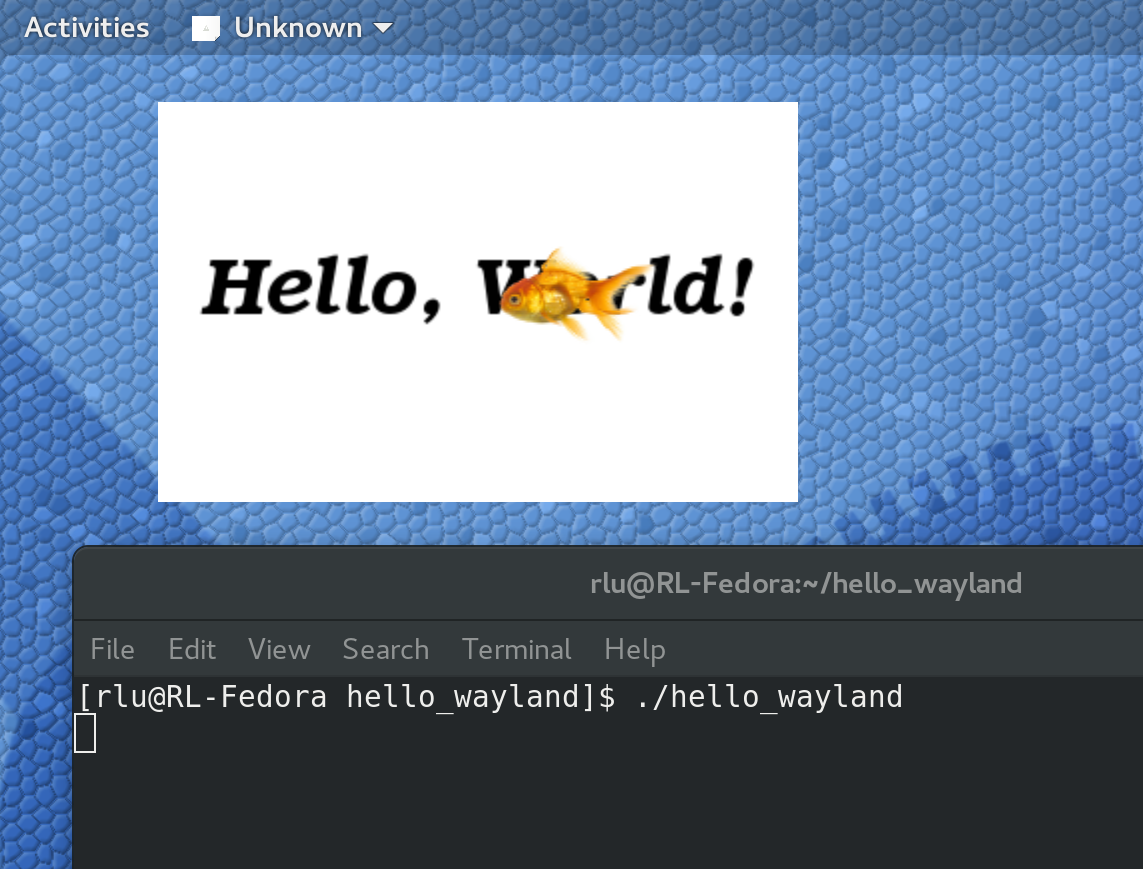
我的截图:

参考
[1]http://wayland.freedesktop.org/architecture.html
[2]http://mirror.linux.org.au/linux.conf.au/2013/ogv/The_real_story_behind_Wayland_and_X.ogv
[3]http://cgit.freedesktop.org/wayland/wayland/tree/
[4]http://wayland.freedesktop.org/docs/html/
[5]http://cgit.freedesktop.org/wayland/wayland/tree/src
[6]http://cgit.freedesktop.org/wayland/wayland/tree/protocol/wayland.xml
[7]http://cgit.freedesktop.org/wayland/weston/tree/